All posts by smsdiva

On Brand Loyalty…

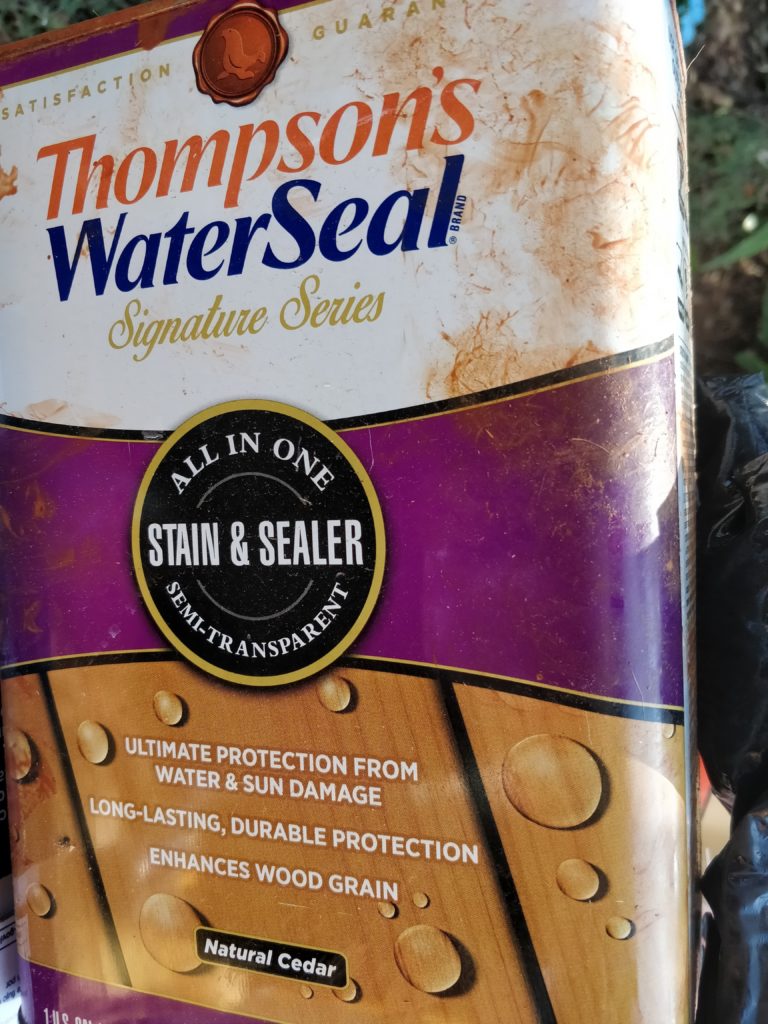
Really I didn’t think It got any more basic than Thomson’s WaterSeal.  The brand has been around as long as I remember.  So when my dad suggested it for my new deck I didn’t worry about buying extra in case I ran out… I mean I was using an off the rack color, it wasn’t going to disappear in the one or two months it took to finish all the decks at the duplex.

I actually was amazed how far that one gallon went.  I did a side deck (4×12) as well as the underside of the patio cover and the underside of the front deck.

Interestingly the same product on the plywood ceiling and doug fir decking gives VERY different colors.  I love the striking orange, especially when viewed from the entrance. The dogs love using this deck as a lookout on all the people walking by.

So I had guests arriving in a couple of hours and a freshly sanded deck that I definitely didn’t want anyone walking across.  I managed to get the step and area in front of the door done before I ran out, so at least we could get in and out, but I really wanted to put furniture out onto the deck for the guests.

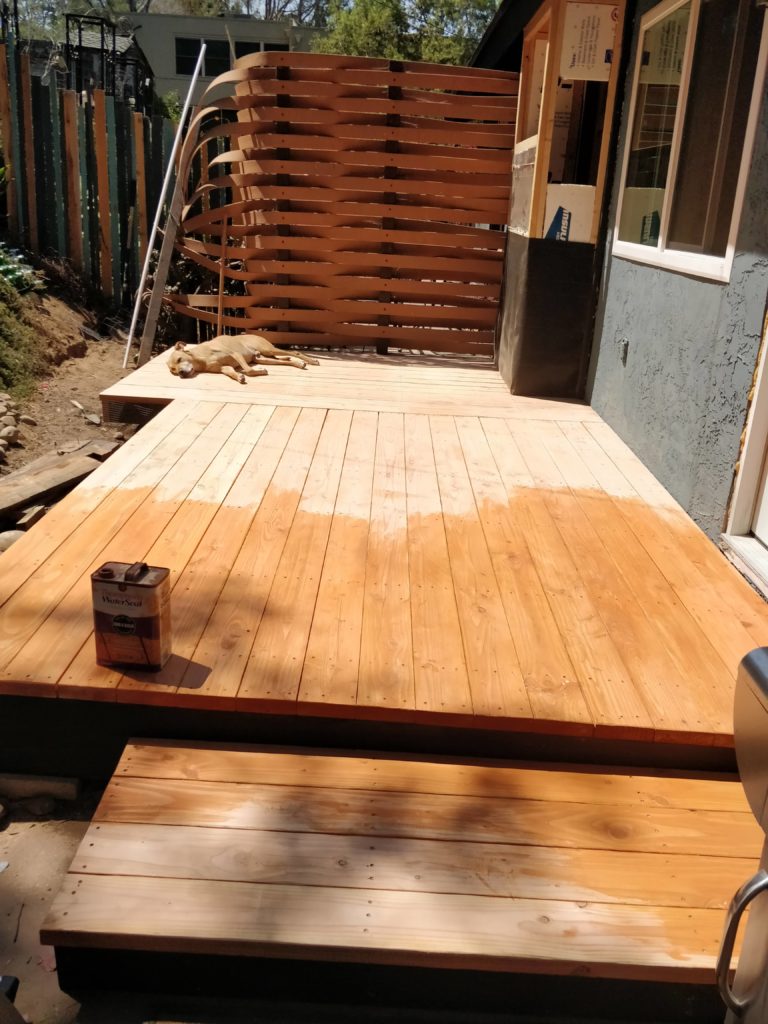
No problem, it was noon and I had several hours before anyone arrived.  A quick trip to Home Depot would be fine, the deck would be in the shade by the time I got back and it would only take an hour or so to get the deck stained.

So you can guess where this is going … Home depot is no longer carrying Thompsons products.  BIIIGGG sigh.  To make it worse I had already done an errand right by Lowes GRRRRRRRR!  I called my dad to vent and he reminded me about Dixieline which was way closer.

Dixieline definitely had lots of Thompson’s products, but the names of the colors were just a touch off.   Woodland Cedar instead of Natural Cedar.  Had they changed the names when they left Home Depot?  Seriously?  I bought a gallon so I wouldn’t have to come back if it was right.


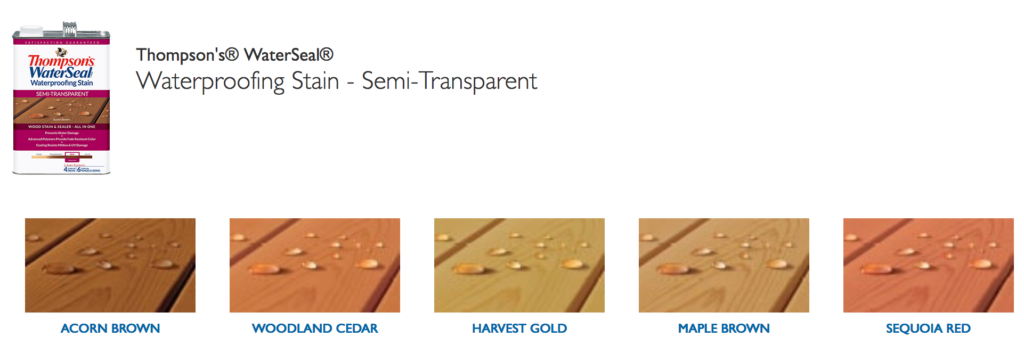
So by the time I got home I had a crushing headache . I went to the Thompson’s site and indeed the line they had at Dixieline was just ever so slightly different than the ones that USED to be at Home Depot and were now at Lowes!  Me and my headache laid down to consider the options.

In the end perfectionism won out over the headache.  I went to Lowes (it’s a Trifecta, all three hardware stores in one day!).   But seriously all of these brands appearing and disappearing is getting downright annoying.  A month ago it was Minwax, also moving from Home Depot to Lowes.  I am not sure what the Home Depot strategy is, moving away from all of the legacy brands that have served us for generations, but there it is…

So the deck is finally stained, but I finished at about 8 pm, so there are no finished pictures … maybe when I build the new divider between the two decks!


Kreg does it again!

I truly adore my Kreg pocket hole jig.  I went from being too timid to start any woodworking projects to joining everything with pocket screws.  I’ve gone through the Kreg catalogue and bought several tools of theirs to try.  I am embarrassed to admit I have had the Kreg Rip-Cut in my possession for nearly 6 months and this is the first time I have gotten it out!  Hey it came needing to be assembled! And there were directions to be read … definitely not my strong suit!  In my defense, the escrow on my uncle’s house closed in May necessitating an all hands on deck family effort to get him moved.  That was followed shortly by my tenant of over four years telling me she was leaving.  So this summer has largely been about practical projects and not what I really wanted to get done (hence the large pile of cedar pickets and paver stones that also languished in my driveway for most of the summer!)

So today I decided that I was going to work on the other set of shed doors.  The last set of doors I built for the half of the shed outside of the gate, I cut the old-fashioned way.  I measured, drew a line, measured the stand off of my circular saw (because it had been so long since I used it I had absolutely no idea what it was), drew a second line, clamped on my 4ft level and finally was ready to cut.  Then when I went to make the next cut (which was exactly the same size) I had to start all over again (except for the measuring the standoff part … luckily it is exactly the same as the narrow dimension of my level … some tool companies did me a big favor!)

So fast forward to today, I needed to make 4 identical strips of sheathing.  My gut instinct was just to do it the way I always did before (especially since it is Saturday and I only got 4 hours of sleep last night so reading directions seemed especially challenging) but I decided I needed to force myself to to try the more efficient way.  I dug the thing out of the back of the shed where it had been subsumed by sedimentary layers of tools stuffed in from various projects…

DSC03371
Why yes, that IS a leather ottoman I am assembling tools on … if it is good enough for my feet, it is good enough for my favorite saw 🙂

Assembly was very straightforward and made me a little embarrassed that I had waited so long to do it (really will I ever learn?).  I was missing one nut, but since I had gotten it at a good discount as an Amazon warehouse deal and I found a spare in my random hardware it was well worth it.

DSC03372
All set up to make the first cut! And do you like that great paint job? When I did the first set of doors, I cleaned my brushes of excess paint on the next board before washing them …hopefully cut down on coats of paint on these doors (and definitely made washing brushes easier!)

I would say it took me about an hour between figuring things out, finding spare parts and a Facebook chat I was having while I was supposed to be working … Saturdays run pretty slow around here.  One of the ears (the left side) just barely made it onto the saw.  The tilt handle was in the way, but the blade guard moved freely and I was ready to go!  I set the width at 8 1/2 inches and let her rip!  The resulting strip was 8 3/8 inch… OOOPS!  Well I had selected this project as a first test because I had a lot of slack to work with.  I adjusted the pointer, set the guide at 8 1/2 again and made cut #2 … this time it was 8 1/2 on the dot.  Woo hoo!

I slid the board over and cut again… Perfect 8 1/2 again with no measuring or clamping.  Shift board, cut 8 1/2 inches, PERFECT! DONE! I believe angels might have sung when I looked at my stack of 8 1/2 inch wide boards made in about 5 minutes.  Fine, three 8 1/2 inch boards and one 8 3/8 board … I’ll take it!

Now this same function could be accomplished with a table saw, but maneuvering panels on a table saw on my own is pretty much impossible, even with these half-sheets that I had cut at Home Depot on their panel saw (a really awesome service!).  Also, I think that the cut was more accurate than when my dad and I have done cuts like this on the table saw.  When things are heavy, we invariably waver, and once you waver, that can add up on all future cuts.  I did make ONE small waver on the first cut (the 2×4 support was protruding and caught the edge of the guide – I was more careful with my support board placement with the other three).  I rotated the board so I had the other factory edge, and the other three cuts went perfectly.  I can see getting a lot of use out of this tool.  I used to dread any project that required the table saw, especially if my dad wasn’t around to wrangle the big heavy sheets.  I think I will be able to use this for most large sheets, and save the table saw for smaller lumber (like ripping cedar) which are light enough for me to handle alone.

My opinion of this saw guide is an unequivocal thumbs up (two thumbs not cut off on a table saw).  It may not fit your saw (mine is a Ridgid 18v bought in 2012) thought the mount is pretty flexible, but if it does, it is awesome.  

I was in no way compensated for this post and all opinions are my own.  I merely liked this tool and wanted to share my love with others who might take advantage.

Sand and DOGS!


So when I got up this morning my paver bed looked like this …DSC02117

SIGH!

DSC02119

I went to the gym and on the way home picked up another 24 bags of sand.  Going to the gym first was probably not the best plan.  Of course there was no one around to help me load.  I slowly plodded through loading knowing that when I got home I still had to carry it down the driveway, stairs and around the house!

DSC02120

Starting day two.  This is about 3/4 of the way finished.  Slow and steady…  Remember each of those bags is 50 lbs of sand.  It really adds up.

DSC02123

The 2×4 helps contain the sand as I pour, giving a clean edge.

DSC02125


LAST BAG! The 2×4 gives one side of the level something to rest on as I scree the sand even.  There is kind of an art to floating the loose end of the level along without digging in, but still leveling things off.DSC02132

FIRST PAVERS!  This is an exciting moment.  I bought these all the way back in MARCH when Lowes had them on special for “Spring Black Friday!

DSC02133

10 down … 110 to go… SIGH!

DSC02139


The end of the first day of paver laying (after finishing the sand in the morning)  … 15 done … not TOO bad, just 105 to go!